Installation
UncoverML requires Python 3.6 or 3.7 on all platforms. Python 3.8 is currently untested and not supported.
Ubuntu 18.04
UncoverML supports Ubuntu 18.04 with Python 3.6 or Python 3.7.
The following instructions may be used for other Linux distributions but the packages and package manager used may be different. If you require help using UncoverML with a different Linux distribution, ask for help on our GitHub Issues page.
Before installing UncoverML, ensure your OS has the following packages:
gdal
openmpi
These can be installed with the following commands:
sudo apt-get install \
    gdal-bin libgdal-dev \
    libblas-dev liblapack-dev \
    libatlas-base-dev libproj-dev \
    gfortran \
    openmpi-bin libopenmpi-dev
It’s recommended to use a Python virtual environment (venv) when installing UncoverML. This will prevent packages that it requires from conflicting with any existing Python environments.
To create a virtual environment, run in your shell:
python3 -m venv /path/to/your/venv
where /path/to/your/venv is the directory where the venv will exist.
Once created, activate the venv with:
source /path/to/your/venv/bin/activate
You are now ready to install UncoverML. To install from the repository, clone using git:
git clone git@github.com:GeoscienceAustralia/uncover-ml
cd uncover-ml
By default, the repository will be on the master branch. UncoverML is under heavy development at this time and master releases are infrequent. It’s recommended to switch to the develop branch using:
git checkout develop
Before the UncoverML package can be installed, there are some required packages that need to be installed first.
pip install -U pip setuptools
pip install -r requirements-pykrige.txt
Once these are done, you can install UncoverML with pip:
pip install .
Alternatively, you can install the latest stable release from the Python Package Index. Note you will have install some prerequisites:
pip install -U pip setuptools
pip install Cython==0.29.13
pip install numpy==1.17.2
pip install scipy==1.3.1
pip install matplotlib==3.1.1
pip install uncover-ml
To ensure the installation has been successful, try running UncoverML against the test data included in the repository:
uncoverml learn tests/test_data/sirsam/random_forest/sirsam_Na_randomforest.yaml
This will start training a random forest model on the test data. It may take a few minutes. If the script completes successfully (there will be a log message saying “Finished!”) then UncoverML has been correctly installed.
This completes the installation. Check out the Usage documentation to get started using UncoverML.
When you are finished using UncoverML, don’t forget to deactivate your virtual environment using:
deactivate
HPC
The following instructions refer specifically to NCI’s Gadi and Virtual Desktop (VDI), but may be applicable to other HPC environments running PBS and MPI.
The first step is to unload unrequired and load required system modules. The below are compatible with the VDI (and Raijin, for legacy purposes):
module unload intel-cc
module unload intel-fc

module load python3/3.6.2
module load gdal/2.2.2
module load openmpi/2.1.1
module load geos/3.5.0
If you are running on the new Gadi supercomputer, the modules required are different:
module load ptython3/3.7.4
module load gdal/3.0.2
module load openmpi/2.1.6
For convenience you can place the above commands in your ~/.bashrc (~/.profile on VDI).
Alternatively, if you already have a configuration in your profile you’d like to preserve but don’t
want to type the above commands every time, you can source the uncover-ml/pbs/setup_vdi.sh or
uncover-ml/pbs/setup_gadi.sh scripts depending on your platform.
When using the NCI, a virtual environment is recommended. To create a virtual environment, run in your shell:
python3 -m venv /path/to/your/venv
where /path/to/your/venv is the directory where the venv will exist.
Once created, activate the venv with:
source /path/to/your/venv/bin/activate
You are now ready to install UncoverML. To install from the repository, clone using git:
git clone git@github.com:GeoscienceAustralia/uncover-ml
cd uncover-ml
By default, the repository will be on the master branch. UncoverML is under heavy development at this time and master releases are infrequent. It’s recommended to switch to the develop branch using:
git checkout develop
Before the UncoverML package can be installed, there are some required packages that need to be installed first.
pip install -U pip setuptools
pip install -r requirements-pykrige.txt
Once these are done, you can install UncoverML with pip:
pip install .
On the VDI you may have to use setup.py to install:
python setup.py install
To ensure the installation has been successful, try running UncoverML against the test data included in the repository:
uncoverml learn tests/test_data/sirsam/random_forest/sirsam_Na_randomforest.yaml
This will start training a random forest model on the test data. It may take a few minutes. If the script completes successfully (there will be a log message saying “Finished!”) then UncoverML has been correctly installed.
This completes the installation. Check out the Usage documentation to get started using UncoverML.
When you are finished using UncoverML, don’t forget to deactivate your virtual environment using:
deactivate
Windows 10
UncoverML can be run on Windows 10 with the help of Anaconda. This guide is intended for general users, but some steps have extra notes pertaining to installing on Geoscience Australia Windows devices.
Microsoft MPI is required to use UncoverML on Windows. Download MS-MPI from the MS-MPI website and install.
You need to install the .msi and .exe files.
Also, add to your Path environment variable the SDK install location
(by default: C:\Program Files (x86)\Microsoft SDKs\MPI).
Search online for “add Windows 10 Path variable” if unsure how to do this.
Note
On Geoscience Australia devices, you will need to install MS-MPI via the Software Center (may be named MS-MPI SDK or similar).
Download Anaconda from the Anaconda website and install.
Note
On Geoscience Australia devices, you will need to install Anaconda from the Software Center.
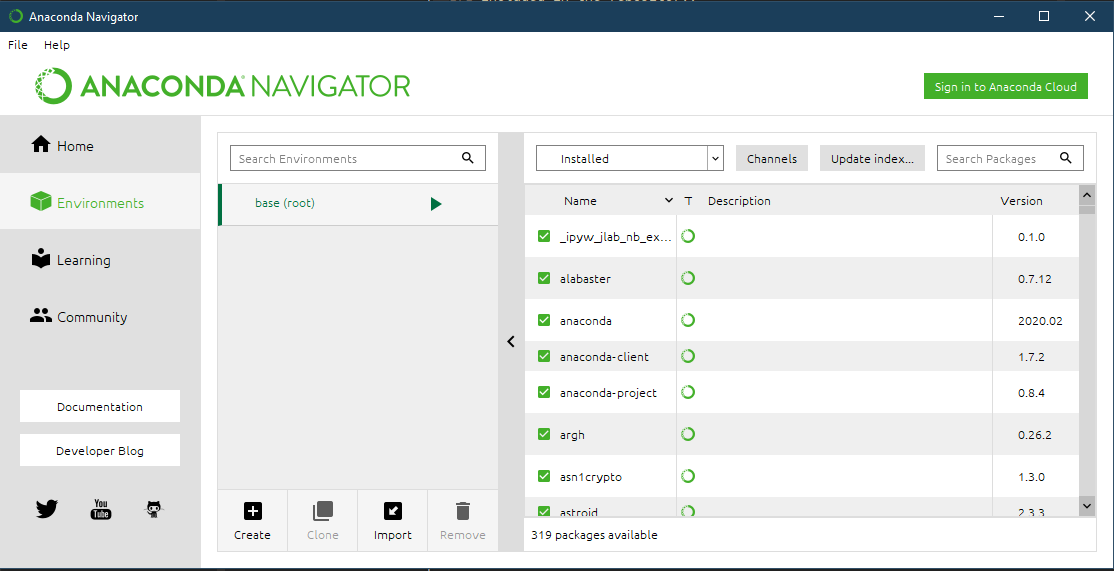
Once installed, open the Anaconda navigator and create a new environment:
Select ‘Environments’ in left sidebar
At the bottom of the screen, select ‘Create’
We’ll use Anaconda to install some required packages:
Select the environment you have just created
In the package list window, select ‘Not installed’ from the filter drop down menu
Type ‘gdal’ into the search bar and click ‘Update index…’
Once the packages have been found, select the checkboxes for ‘gdal’ and ‘libgdal’ and click ‘Apply’. A window will display showing required dependencies to install. Accept these and continue.
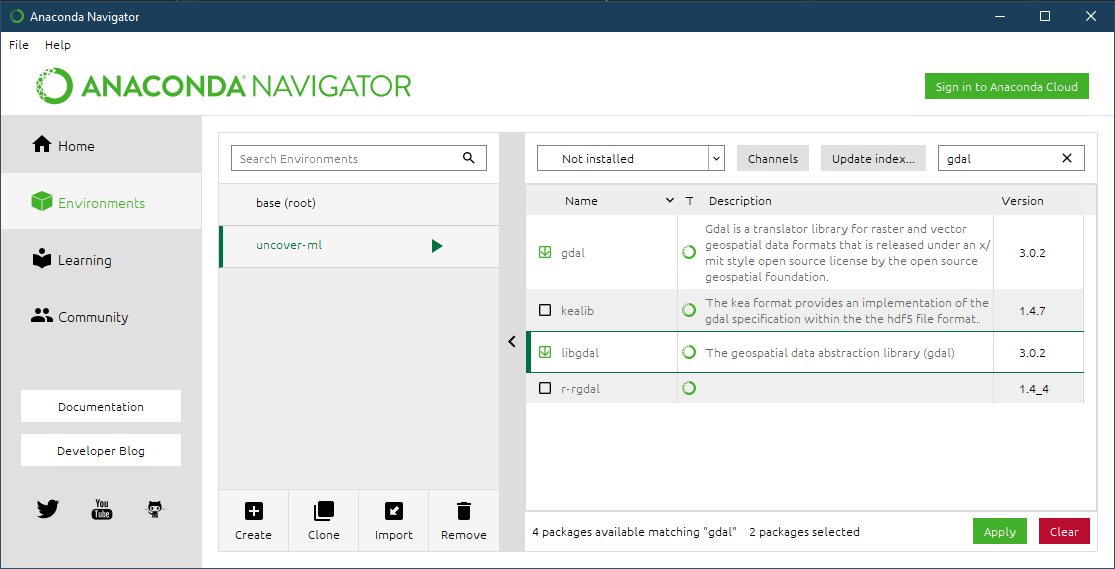
Repeat the above process for the following packages (‘Update index…’ doesn’t need to be clicked again):
rasterio
fiona
Once complete, open a terminal with your environment activated by clicking the right-facing arrow next to your environment name and selecting ‘Open Terminal’.
Install the MPI Python library:
In the terminal, run:
conda install -c intel mpi4py
Now clone the UncoverML repository:
Note
Cloning the repository can be done through Git Bash or your preferred git client. In this case it’s done through the Windows CMD terminal for convenience.
Navigate to your desired directory
<DRIVE_LETTER>:will change drives in the Windows CMD terminal andcd <path>will change directories.
Clone the repository using git clone https://github.com/GeoscienceAustralia/uncover-ml.git
If you do not have git installed, you can install it using Anaconda navigator using the method above
Once cloned, cd into the repository using
cd uncover-mlBy default, the repository will be on the master branch. UncoverML is under heavy development at this time and master releases are infrequent. It’s recommended to switch to the develop branch using
git checkout develop
Pip can now be used to install UncoverML into our Anaconda environment:
In the terminal, run:
pip install -r requirements-pykrige.txt
pip install .
UncoverML will now be installed in your Anaconda environment.
To test that it’s operational, run the included Windows test config:
Modify the example config to point to your uncover-ml repository so that the test data can be found:
Open
...\uncover-ml\configs\windows_random_forest.yamlin a text editor and modify the
section of the file paths on lines 13, 20, 35 and 41 that contain
path\to\uncovermlto the path to where you cloned the uncover-ml repository. For example, if I cloned the repository toC:\Users\bmousthen this would becomeC:\Users\bmous\uncover-ml\rest-of-pathIn the terminal, run:
uncoverml learn configs\windows_random_forest.yaml
This trains a multirandomforest model on some test data
In the terminal, run:
uncoverml predict configs\windows_random_forest.yaml
This performs a prediction on the test data using the trained model
If the installation and execution was successful, then the results will be available
in ...path to uncover-ml repository\random_forest_out.
On Windows, multiprocessing can be utilised by running UncoverML commands using mpiexec:
mpiexec -n 4 uncoverml learn configs\windows_random_forest.yaml
Where -n 4 specifies to run the training with 4 processors.
With that the installation is complete. Read the documentation further to learn how to fully utilise UncoverML. When you want to run UncoverML on Windows, make sure to launch a terminal from Anaconda Navigator using your UncoverML environment.
Note
You may get a Windows firewall warning asking for exceptions for mpiexec and Hydra proxy. These can be safely canceled. The networking requirement of MPI will work on local machines without setting firewall rules.
Warning
The Cubist functionality is currently not available when using Windows. This requires further work in making Cubist compatible with Windows and writing a Cubist install script for Windows.